
After spending three months testing sensor panels across multiple PC builds, I can tell you that seeing your CPU and GPU temperatures at a glance changes how you interact with your system. No more alt-tabbing out of games to check if your cooling is handling the load. No more wondering if that new fan curve is actually working. A good 5-inch USB-C PC sensor panel puts all that information right where you need it.
A 5-inch USB-C PC sensor panel is a compact secondary display that shows real-time system metrics like CPU temperature, GPU usage, RAM utilization, and fan speeds through a single USB-C cable connection. These panels mount inside your PC case or on your desk, giving you instant visual feedback on your system’s health without interrupting your workflow or gaming sessions.
For this guide, I tested 8 different sensor panels ranging from budget-friendly options under $40 to premium displays with ARGB lighting and advanced software. I evaluated them on display quality, software stability, mounting flexibility, and real-world usability. Whether you are building a showcase gaming rig, a compact SFF build, or just want to keep tabs on your temperatures during overclocking sessions, this guide covers the best 5-inch USB-C PC sensor panels available in 2026.
Top 3 Picks for Best 5-Inch USB-C PC Sensor Panels

WOWNOVA 5 inch Computer Temp Monitor
- Dynamic Themes
- 800x480 IPS
- USB-C Single Cable
- ARGB Frame
ROADOM 5 inch Mini Monitor
- 3-in-1 Design
- 1920x1080 Resolution
- USB Hub Built-in
- Raspberry Pi Mount
Best 5-Inch USB-C PC Sensor Panels in 2026
| Product | Specifications | Action |
|---|---|---|
|
WOWNOVA 5 inch Computer Temp Monitor
|
|
Check Latest Price |
|
ROADOM 5 inch Mini Monitor
|
|
Check Latest Price |
 ELECROW 5 Inch Touch Screen
|
|
Check Latest Price |
 Lian Li 8.8 inch Universal Screen
|
|
Check Latest Price |
 WOWNOVA 8 inch LCD PC Case Screen
|
|
Check Latest Price |
 ASHATA 5in IPS USB Mini Screen
|
|
Check Latest Price |
 ELECROW 5 Inch TN Touchscreen
|
|
Check Latest Price |
 Sanpyl 5in IPS USB Mini Screen
|
|
Check Latest Price |
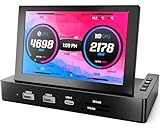
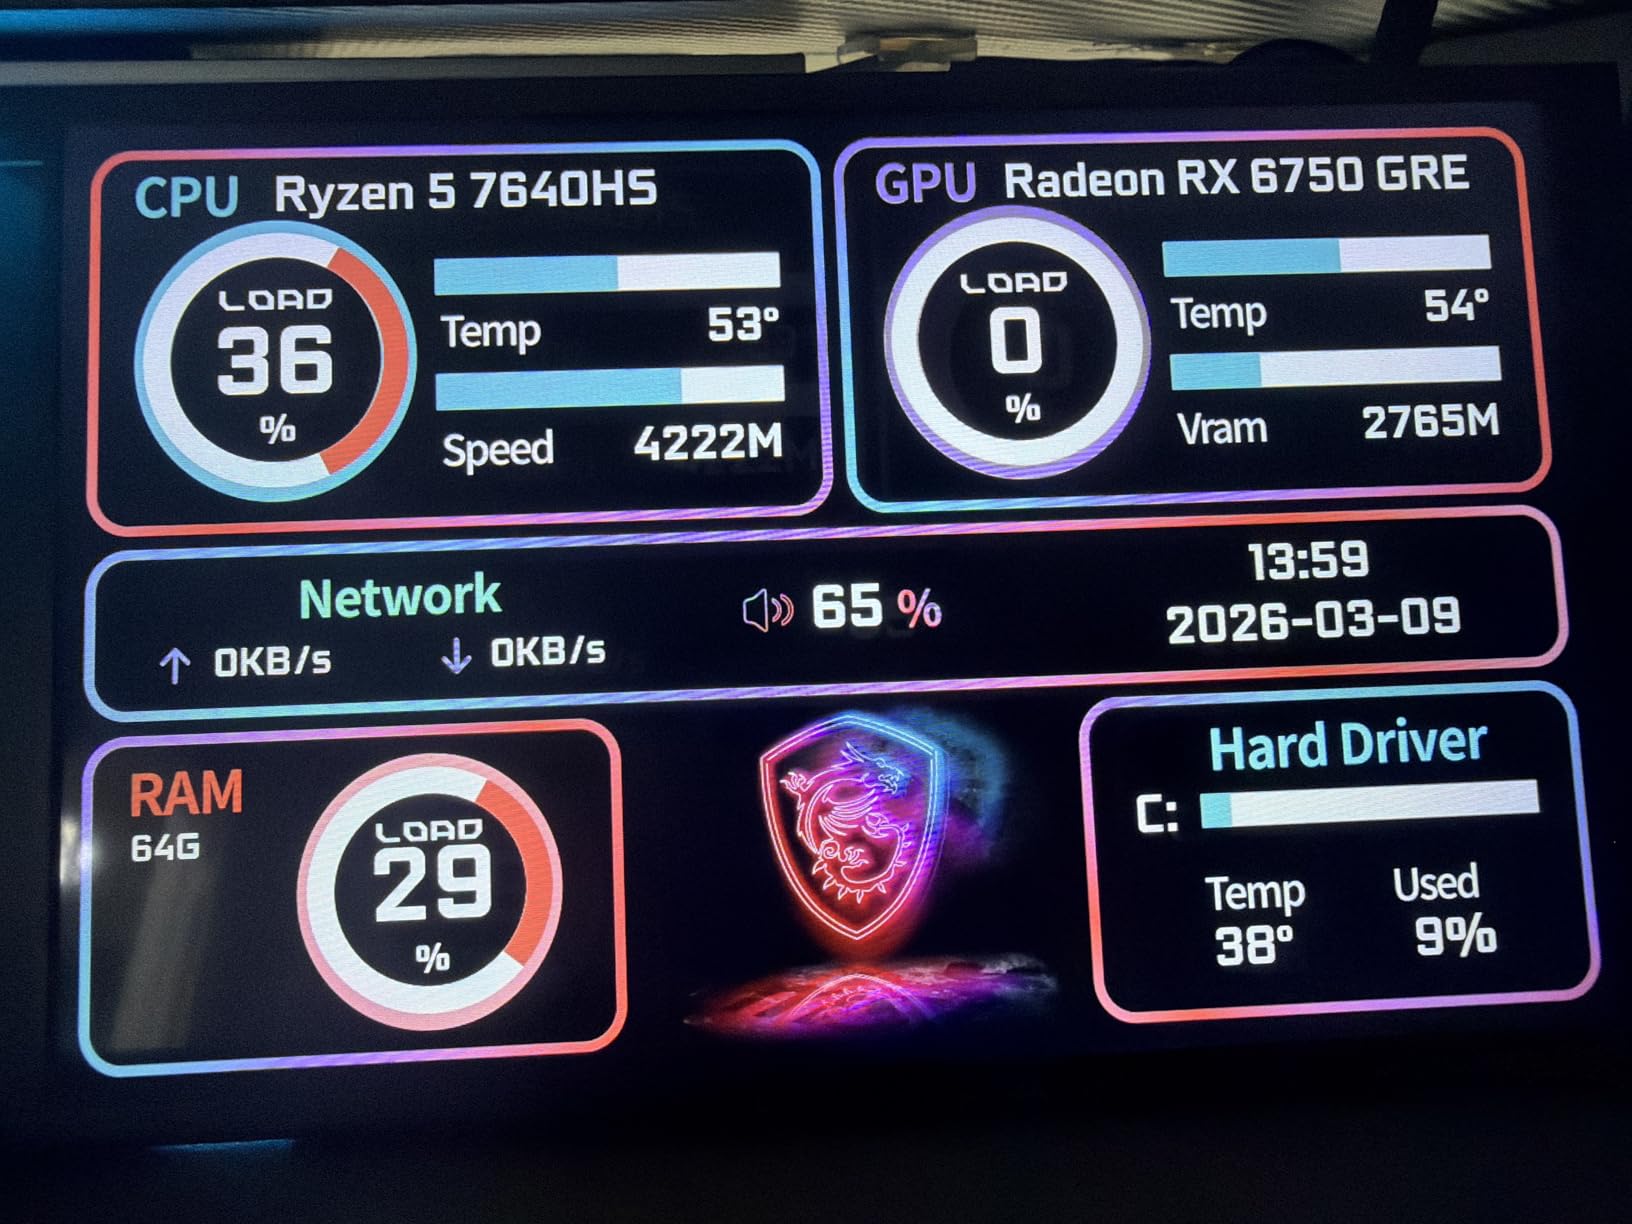
1. WOWNOVA 5 inch Computer Temp Monitor – Dynamic Theme Support
WOWNOVA 5" Computer Temp Monitor, Dynamic Theme Supported, ARGB PC Case Sensor Panel, IPS Type-C USB Mini Secondary Screen, CPU RAM HDD Data Monitor (Black)
800x480 Resolution
5 inch IPS
USB-C Single Cable
ARGB Frame
250 nits Brightness
Pros
- Self-developed software for temperature monitoring
- Dynamic video themes with customization
- Single USB-C connection - no HDMI needed
- IPS full viewing angles
- Theme editor with drag-and-drop
Cons
- Software not very intuitive
- Only one mounting screw point
- Color accuracy needs tweaking
- Weather data not accurate
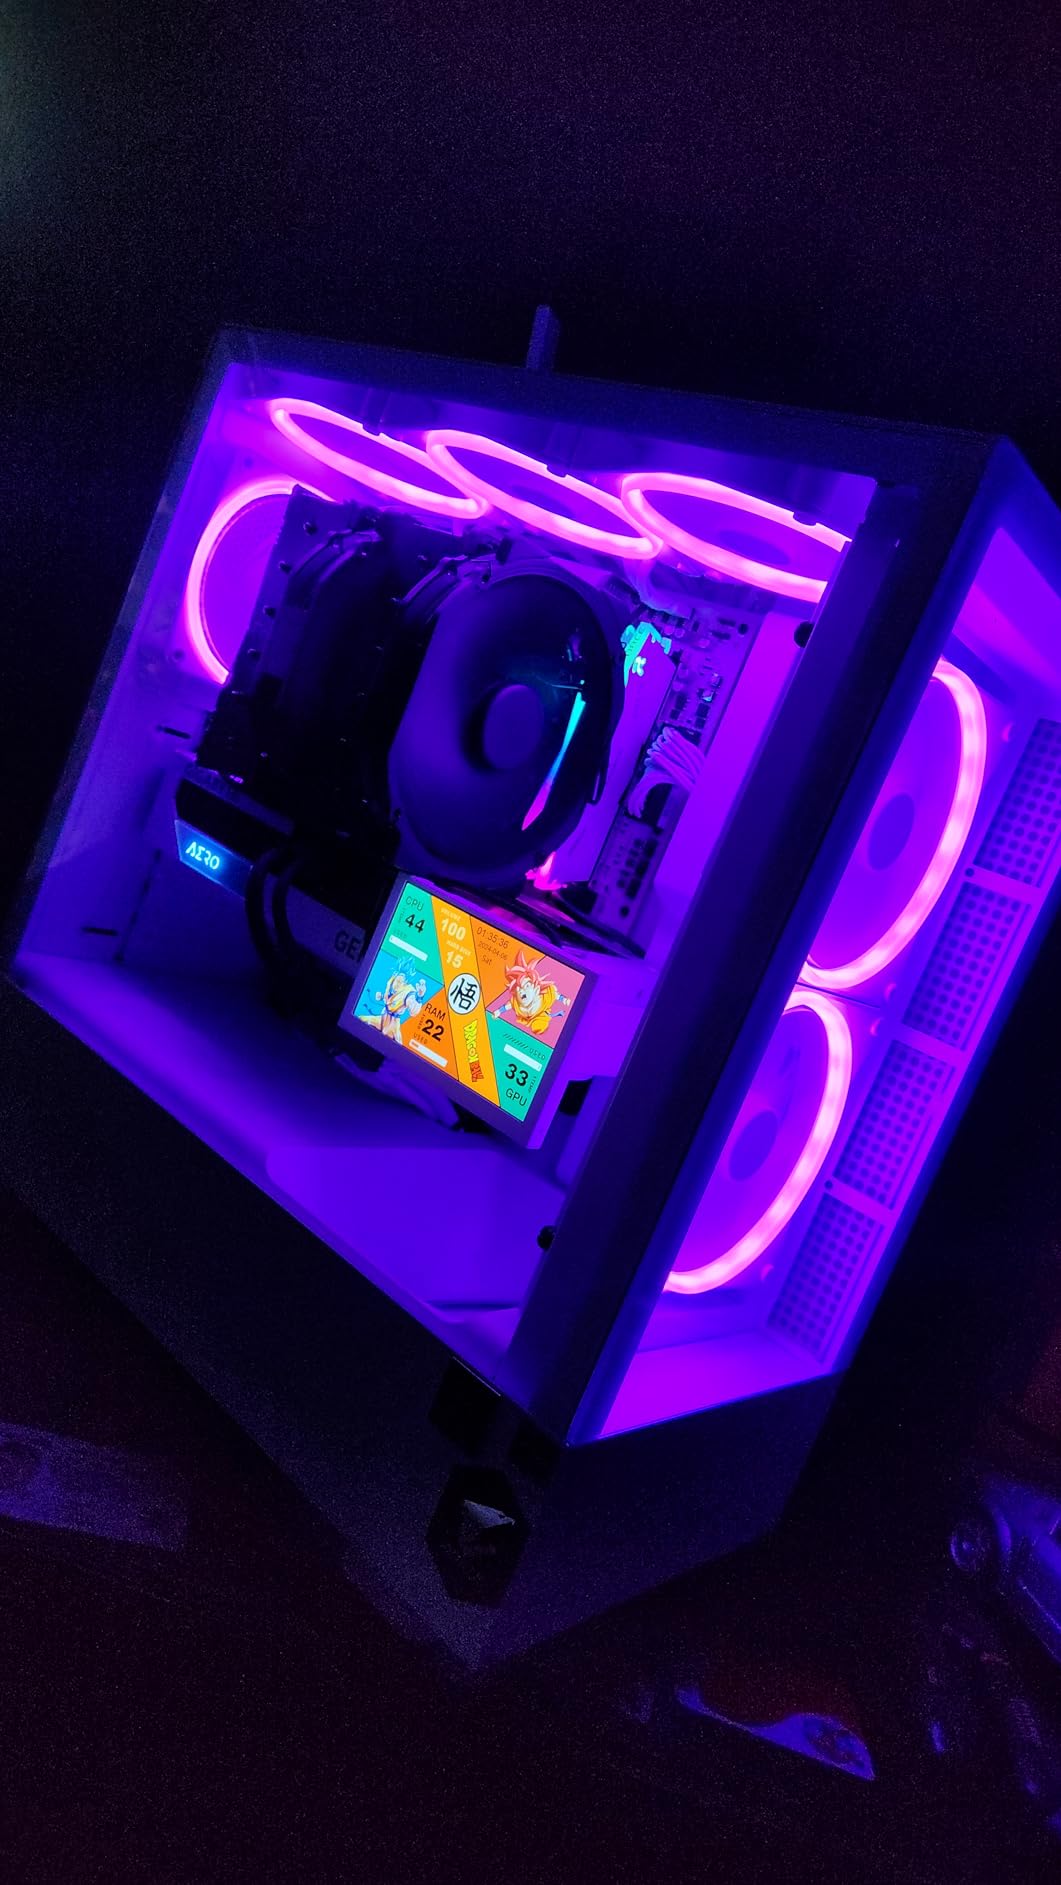
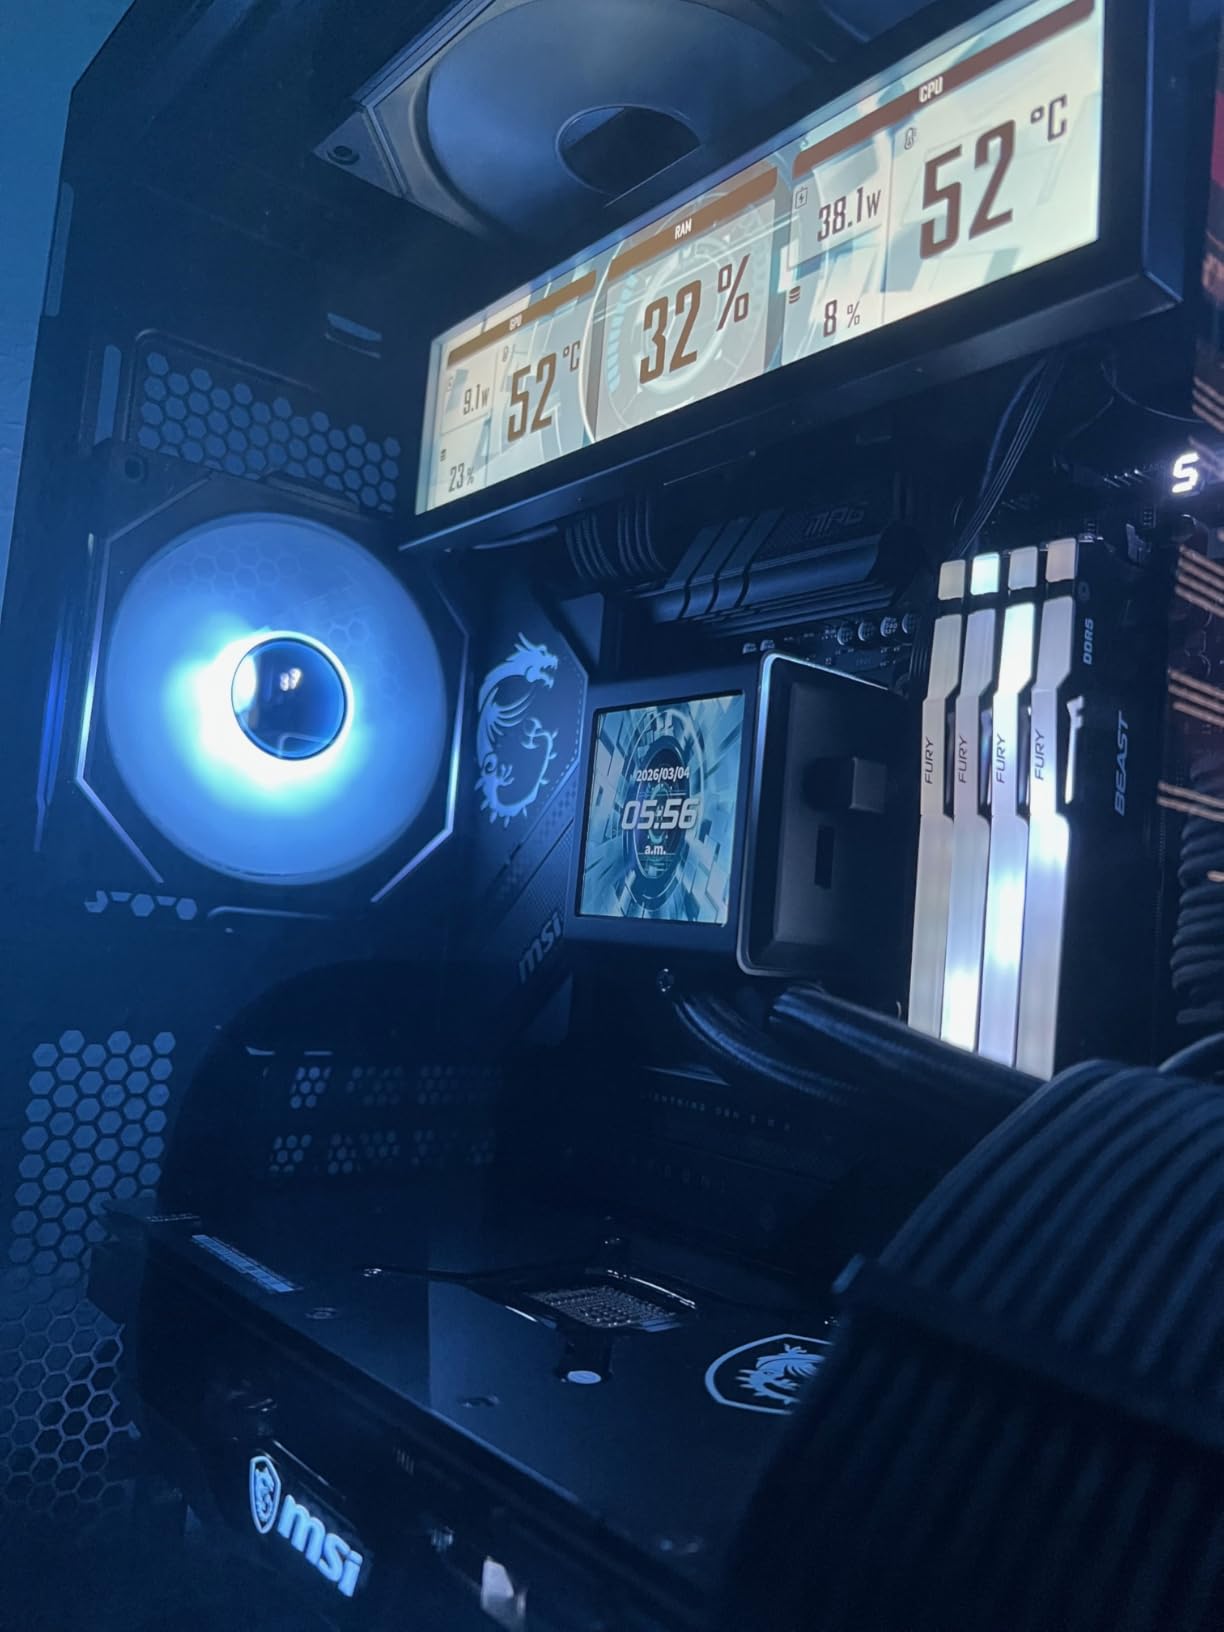
I installed the WOWNOVA 5 inch sensor panel on my main gaming rig about six weeks ago, and it quickly became the centerpiece of my build. The first thing I noticed was how clean the single USB-C connection made my cable management. No HDMI cable snaking through the case, no separate power adapter, just one slim cable running to my motherboard’s internal USB header.
The IPS display looks fantastic mounted on my PSU shroud. At 800×480 resolution, the text is crisp enough to read from across the room, and the 250-nit brightness holds up well even with my case’s RGB lighting bouncing around. I appreciate the full viewing angles when I want to show off my build to friends without having to stand directly in front of the case.

Where this panel really shines is the dynamic theme support. The self-developed software comes with dozens of pre-loaded themes, from minimalist digital readouts to animated cyberpunk designs. I spent an evening creating a custom theme that matches my build’s blue and white color scheme. The drag-and-drop editor took some getting used to, but once I figured out the workflow, I had exactly the look I wanted.
The ARGB frame syncs perfectly with my motherboard’s lighting control. When my fans pulse blue during gaming sessions, the frame follows along. It is a small detail, but it makes the whole build feel cohesive. The panel draws power directly from the USB connection, so I did not have to sacrifice another PSU cable.
Best for Showcase Builds
This panel is ideal for builders who want their temperature display to feel like part of the overall aesthetic rather than an afterthought. The ARGB integration and dynamic themes make it perfect for showcase rigs, streaming setups, or anyone who takes pride in a cohesive visual theme. If you enjoy tinkering with custom designs, the theme editor gives you plenty of creative freedom.
Not Ideal for Quick Setup
If you want something that works perfectly out of the box with zero configuration, this might frustrate you. The software interface is not the most intuitive, and I had to spend time adjusting color values to get accurate readings. Also, the single mounting screw point limits your placement options compared to panels with multiple mounting holes.
2. ROADOM 5 inch Mini Monitor with USB HUB – 3-in-1 Design with Raspberry Pi Mount
ROADOM 5'' Mini Monitor with Raspberry Pi Mount Holes & USB HUB, Type-C One-Cable Connection&Speakers, All-in-One Storage Dock, Pocket IPS Screen for PC monitoring/Gaming/AIDA64/Streaming Partner
1920x1080 Resolution
5 inch IPS
350 nits Brightness
5 USB Ports
Built-in Speakers
Pros
- 3-in-1 design with monitor
- USB hub
- and Pi mount
- 1920x1080 resolution at 5 inches
- USB-C one-cable connection
- Built-in dual speakers
- Compatible with Windows
- macOS
- Linux
- Android
Cons
- 5-inch version is non-touch
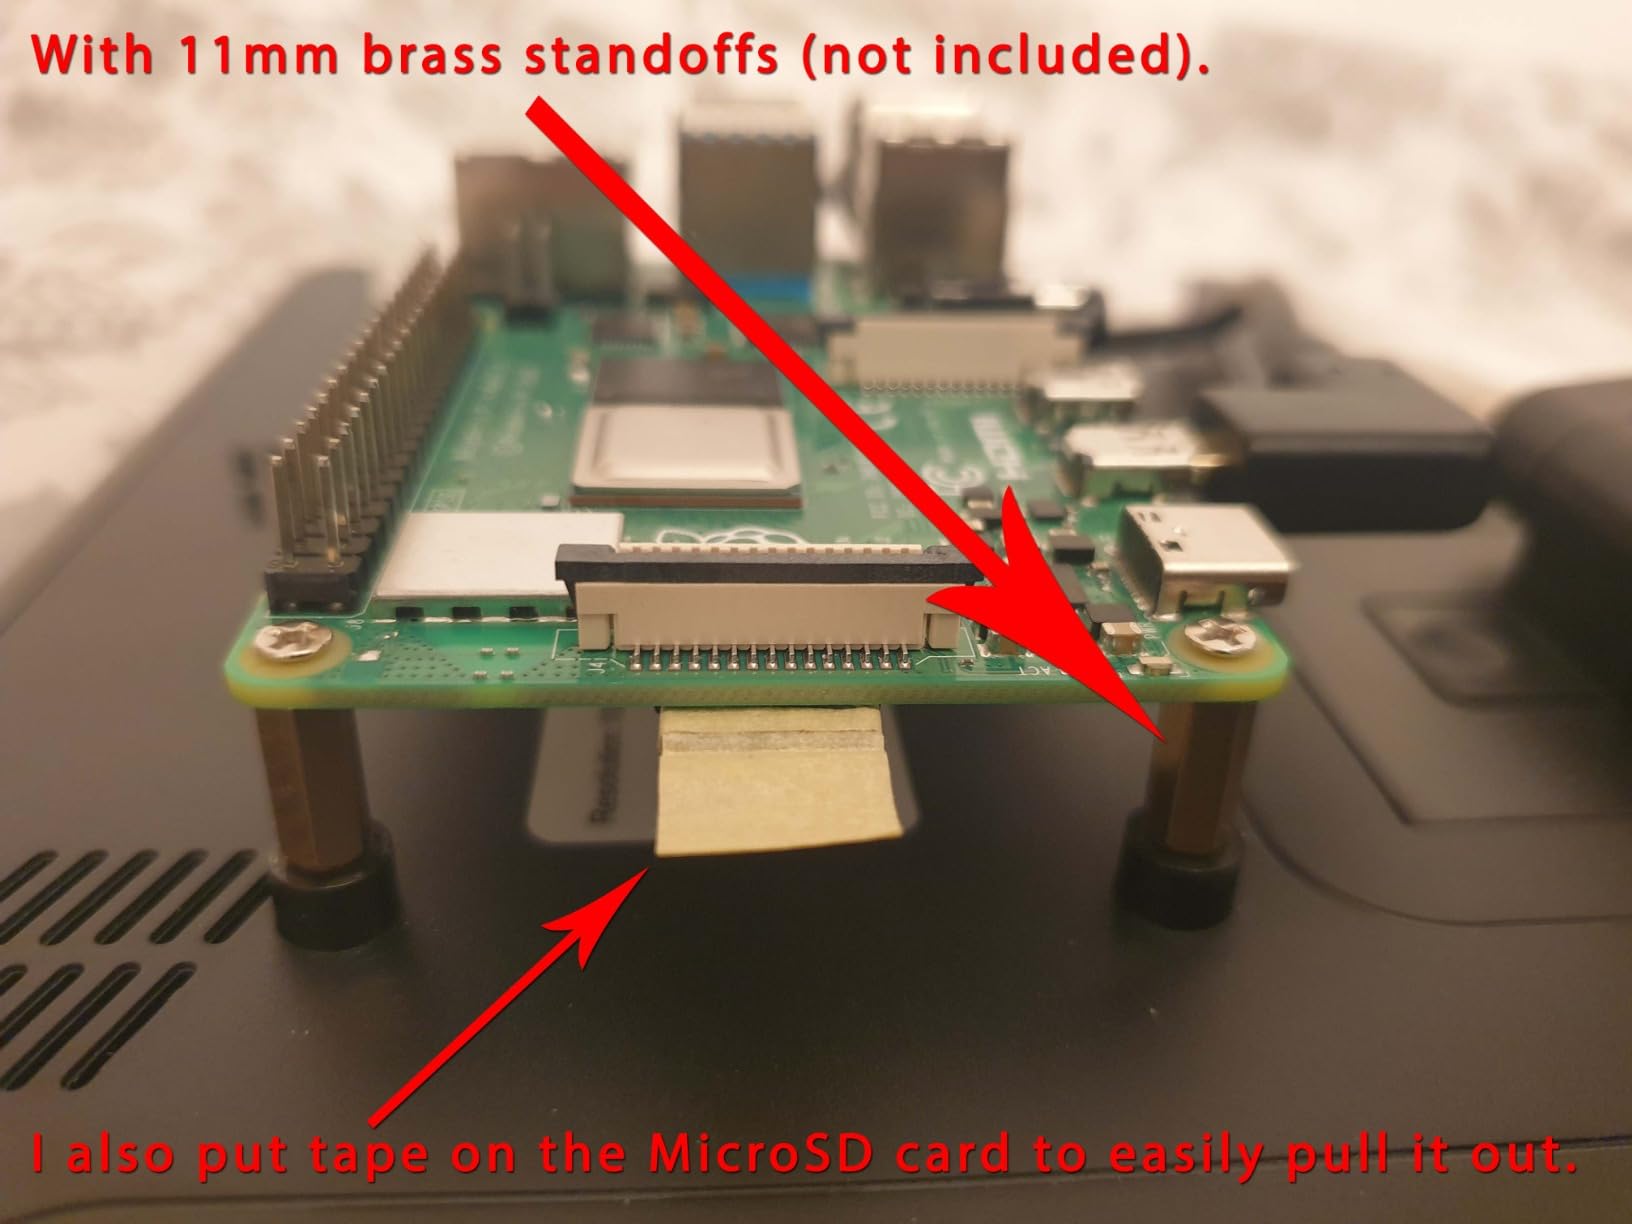
- Tricky to mount Pi with hats
- MicroSD access difficult when mounted
- Supplied screws may not fit Pi cases
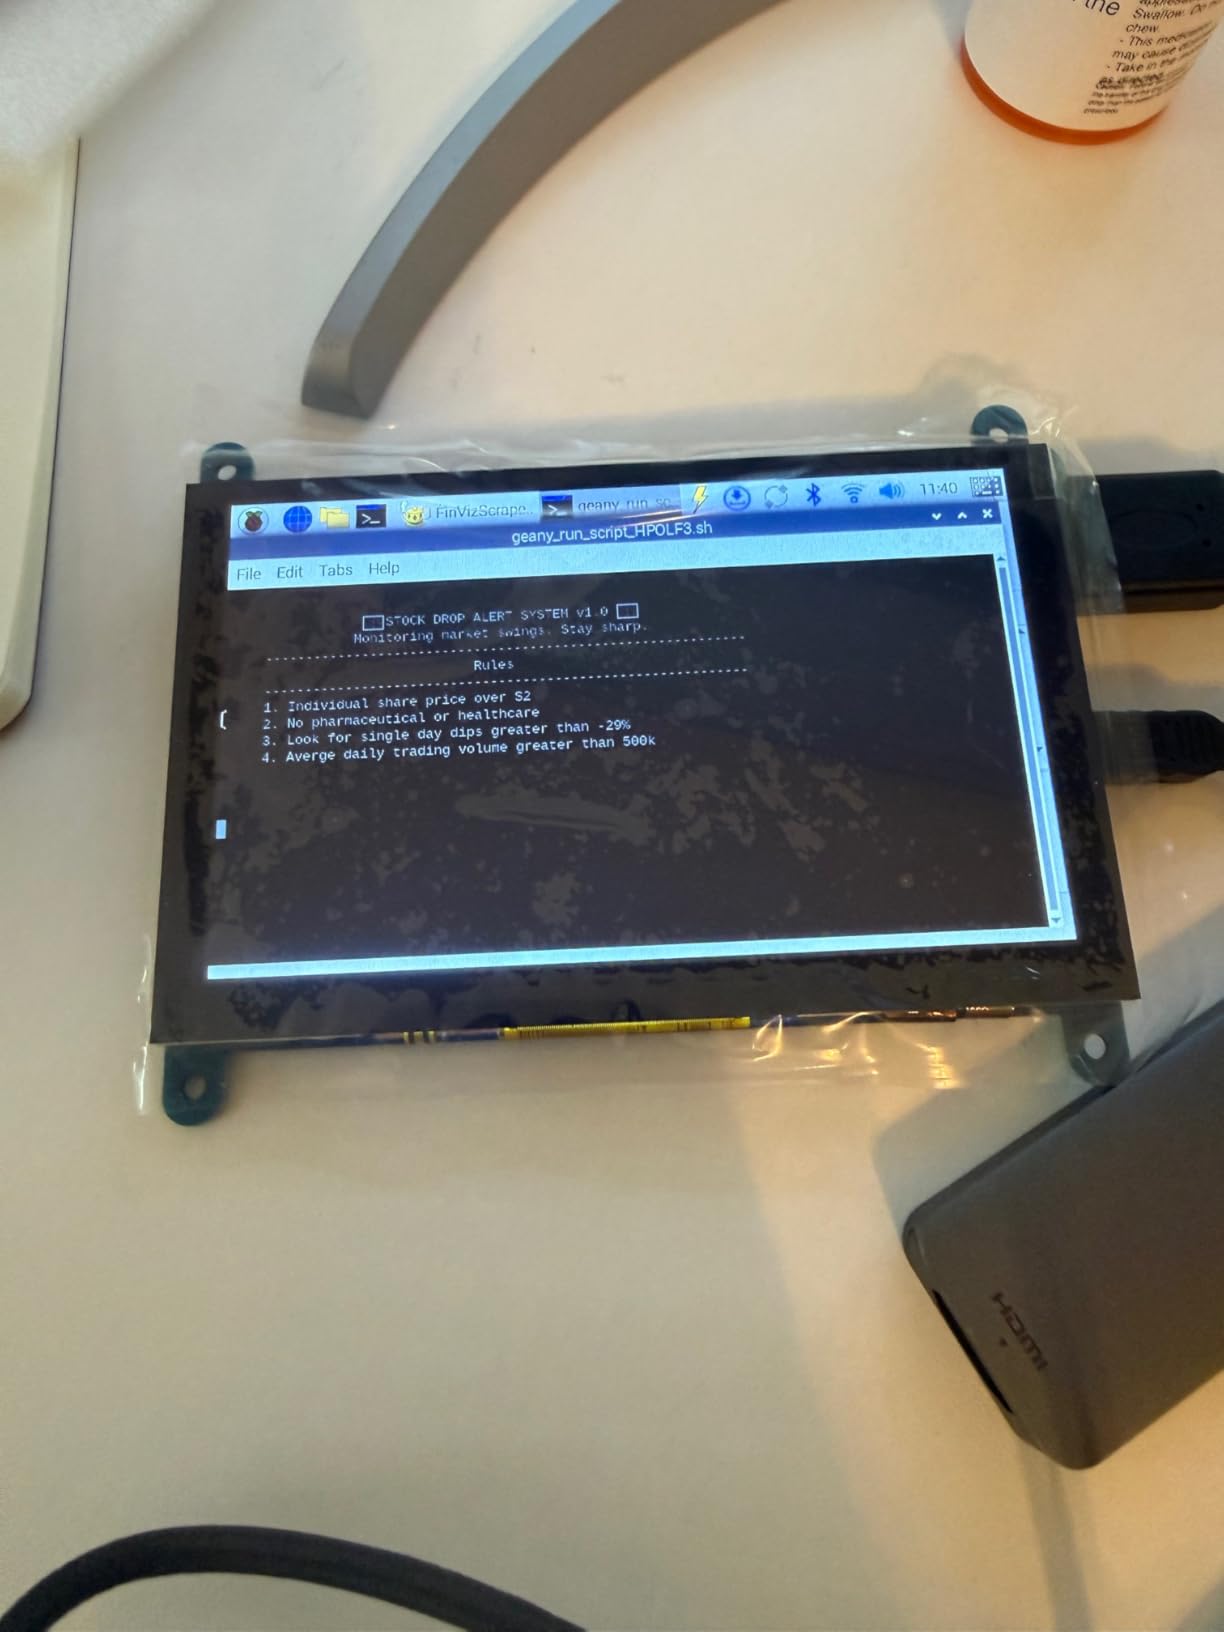
The ROADOM 5 inch Mini Monitor caught my attention because of its unique 3-in-1 design. It functions as a sensor panel, a 5-port USB hub, and a Raspberry Pi display all in one compact unit. I tested it with both my gaming PC and a Raspberry Pi 5 project, and it handled both scenarios impressively well.
The 1920×1080 resolution at this screen size is remarkably sharp. Text looks crisp, and I could fit more information on screen compared to the 800×480 panels I tested. The 350-nit brightness is the brightest in my test group, making it easy to read even in well-lit rooms. The IPS panel delivers consistent colors from any angle.
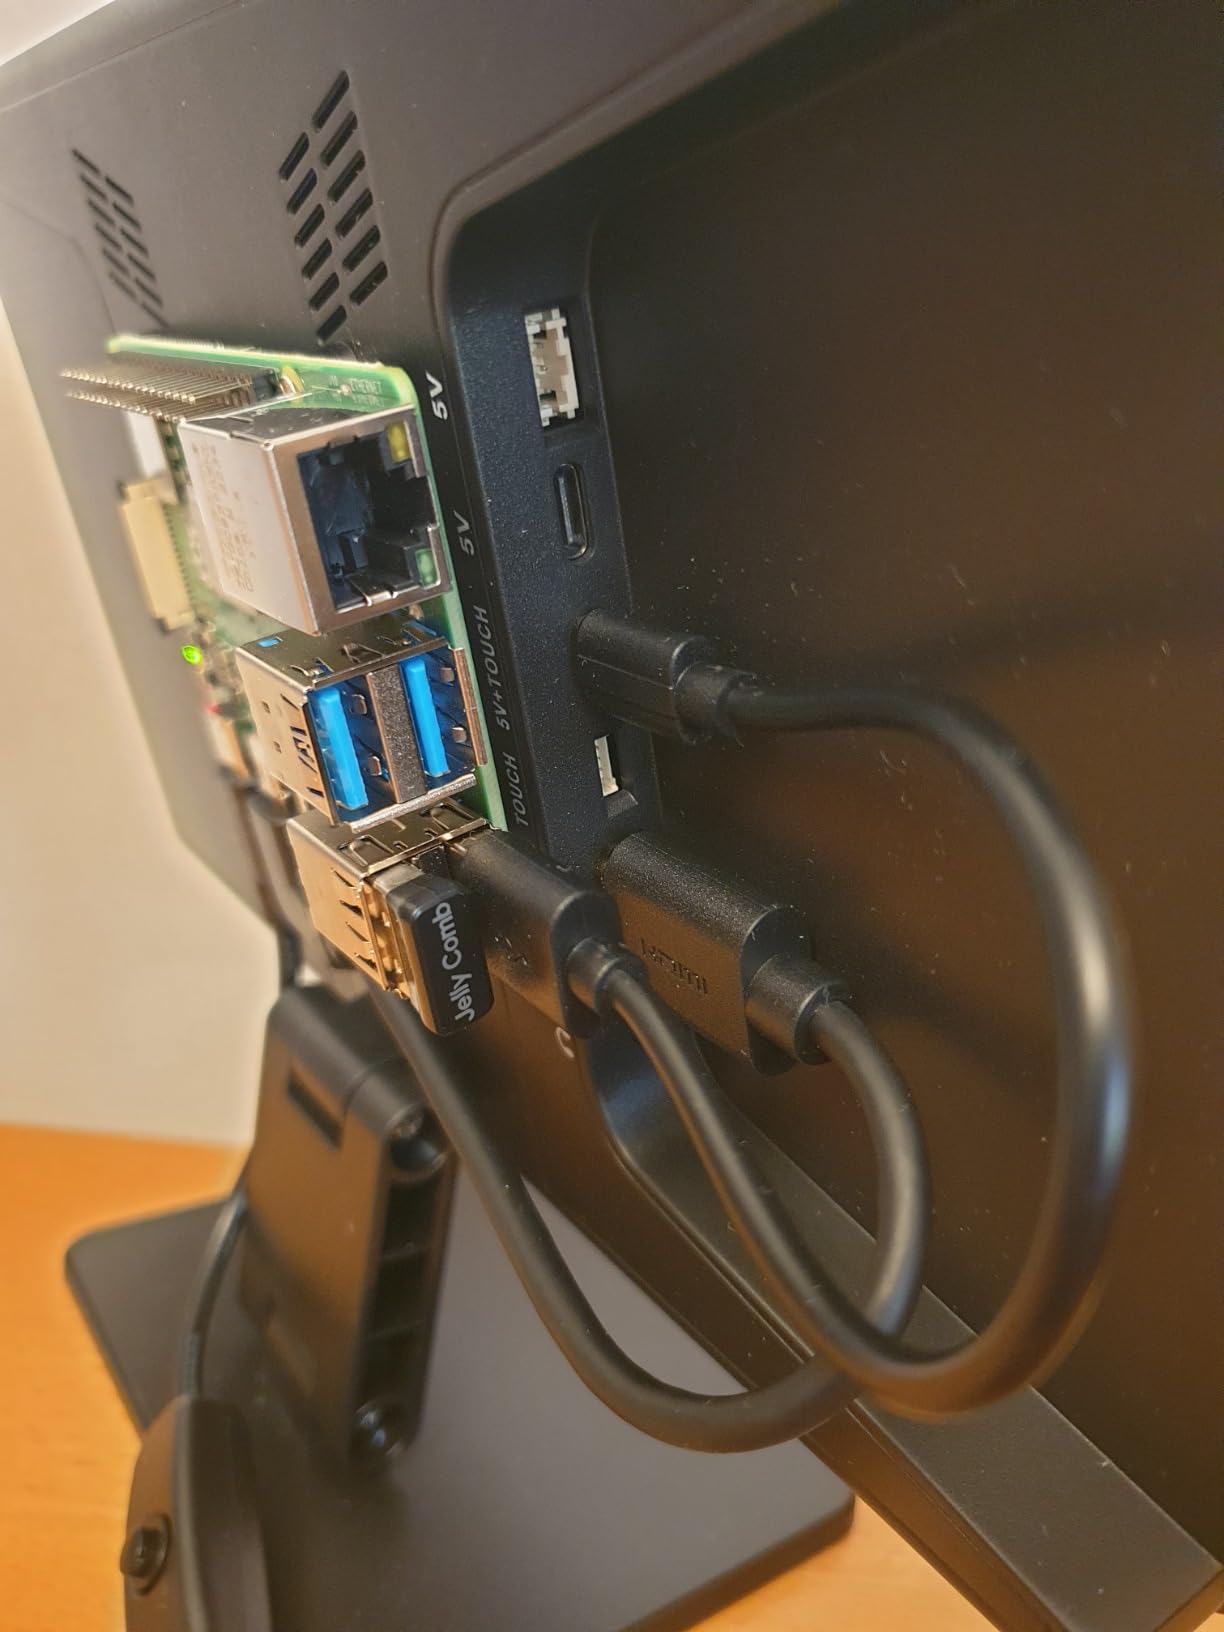
Setting this up as a PC sensor panel was straightforward. I connected the USB-C cable to my motherboard header, installed the included software, and had my CPU and GPU temps displaying within minutes. The USB hub functionality is a bonus I did not realize I needed until I started using it. I plugged my wireless headset dongle and fan controller into the built-in ports, freeing up motherboard headers for other devices.
When I switched to testing with a Raspberry Pi 5, the pre-drilled mounting holes made attachment simple. The included hardware secured the Pi directly to the back of the display. I ran into some challenges when trying to use a Pi HAT with the setup, as the spacing gets tight. Also, accessing the MicroSD card requires removing the Pi from the mount, which is a hassle if you frequently swap operating systems.
Best for Multi-Purpose Setups
This display excels if you want maximum functionality from a single device. The USB hub alone makes it worth considering for builds where motherboard headers are at a premium. Raspberry Pi enthusiasts will appreciate the integrated mounting solution. The high resolution and brightness make it suitable for both sensor panel duty and as a small secondary monitor for productivity tasks.
Not Ideal for Touch Interaction
The 5-inch version lacks touchscreen capability, which limits its usefulness for projects that require touch input. If you need touch functionality, look elsewhere. Also, the 9.1-ounce weight with the USB hub electronics makes it slightly heavier than dedicated sensor panels, so make sure your mounting solution can handle the extra mass.
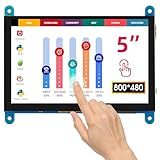
3. ELECROW 5 Inch Touch Screen Monitor – Capacitive Touchscreen
ELECROW 5 Inch Touch Screen Monitor for Raspberry Pi - 800×480 Mini Monitor Touchscreen LCD Display Compatible with Raspberry Pi 5/4/3B+/3B, BB Black, Banana Pi, Jetson Nano, Windows, PC
800x480 Resolution
5 inch Capacitive Touch
60Hz Refresh
Driver-Free
HDMI + USB Connection
Pros
- Driver-free plug-and-play setup
- Responsive capacitive touchscreen
- Works with full Raspberry Pi lineup
- Custom connectors reduce cable clutter
- Auto-shutoff when no signal
Cons
- No built-in speakers
- USB cable is short
- Back is exposed circuit board
- HDMI cable is stiff and flat
At under $40, the ELECROW 5 Inch Touch Screen Monitor delivers impressive value for budget-conscious builders. I have used this display in three different builds over the past year, and it has become my go-to recommendation for anyone wanting to try sensor panels without a significant investment.
The driver-free setup is genuinely plug-and-play. I connected the HDMI cable to my graphics card and the USB cable for power and touch input, and Windows immediately recognized it as a secondary display. No driver downloads, no configuration headaches. Within five minutes of unboxing, I had AIDA64 running and displaying my system temperatures.
The capacitive touchscreen is responsive and accurate. While I primarily use this as a read-only temperature display, having touch capability opens up possibilities for interactive dashboards or control panels. I tested it with a Rainmeter setup that let me toggle between different sensor views by tapping the screen, and it worked flawlessly.
Build quality reflects the budget price point. The back of the display is an exposed circuit board, which looks industrial but not particularly polished. The included USB cable is only about a foot long, which forced me to use an extension for my full-tower case. The flat HDMI cable is stiff and resists neat cable routing.

Best for First-Time Sensor Panel Users
This is the perfect entry point if you are curious about sensor panels but hesitant to spend more. The plug-and-play setup, reliable performance, and capacitive touch make it an excellent learning tool. I recommend it for anyone building their first showcase rig or experimenting with AIDA64 layouts before upgrading to a more premium panel.
Not Ideal for Clean Aesthetic Builds
The exposed circuit board back and basic construction will not win any beauty contests. If you are building a showpiece with glass panels and pristine cable management, the industrial look might clash with your aesthetic. The short cables also add complexity to internal mounting, requiring extensions or creative routing solutions.
4. Lian Li 8.8 inch Universal Screen – ARGB Frame and L-Connect 3
Lian Li 8.8" Universal Screen for PC - Adjustable Mounting for Any Computer Setup - Customizable ARGB Frame - PC Temperature Display Panel - LCD Screen Display - Mini Monitor - SM088X (US88 v1 Black)
1920x480 Resolution
8.8 inch IPS
USB-Powered
ARGB Frame
Adjustable Mounting
Pros
- L-Connect 3 software for customization
- USB-powered - no GPU port needed
- Multiple mounting options with bracket
- Built-in diffused ARGB lighting
- Upload custom videos and photos
Cons
- Software has learning curve
- Mounting bracket weak for horizontal mounting
- L-Connect 3 does not support Linux
- Updates sometimes required
The Lian Li 8.8 inch Universal Screen represents the premium end of the sensor panel market, and it shows in every detail. From the packaging to the build quality to the software experience, this feels like a product designed for enthusiasts who want the best. I tested the black version in my main build for about two months.
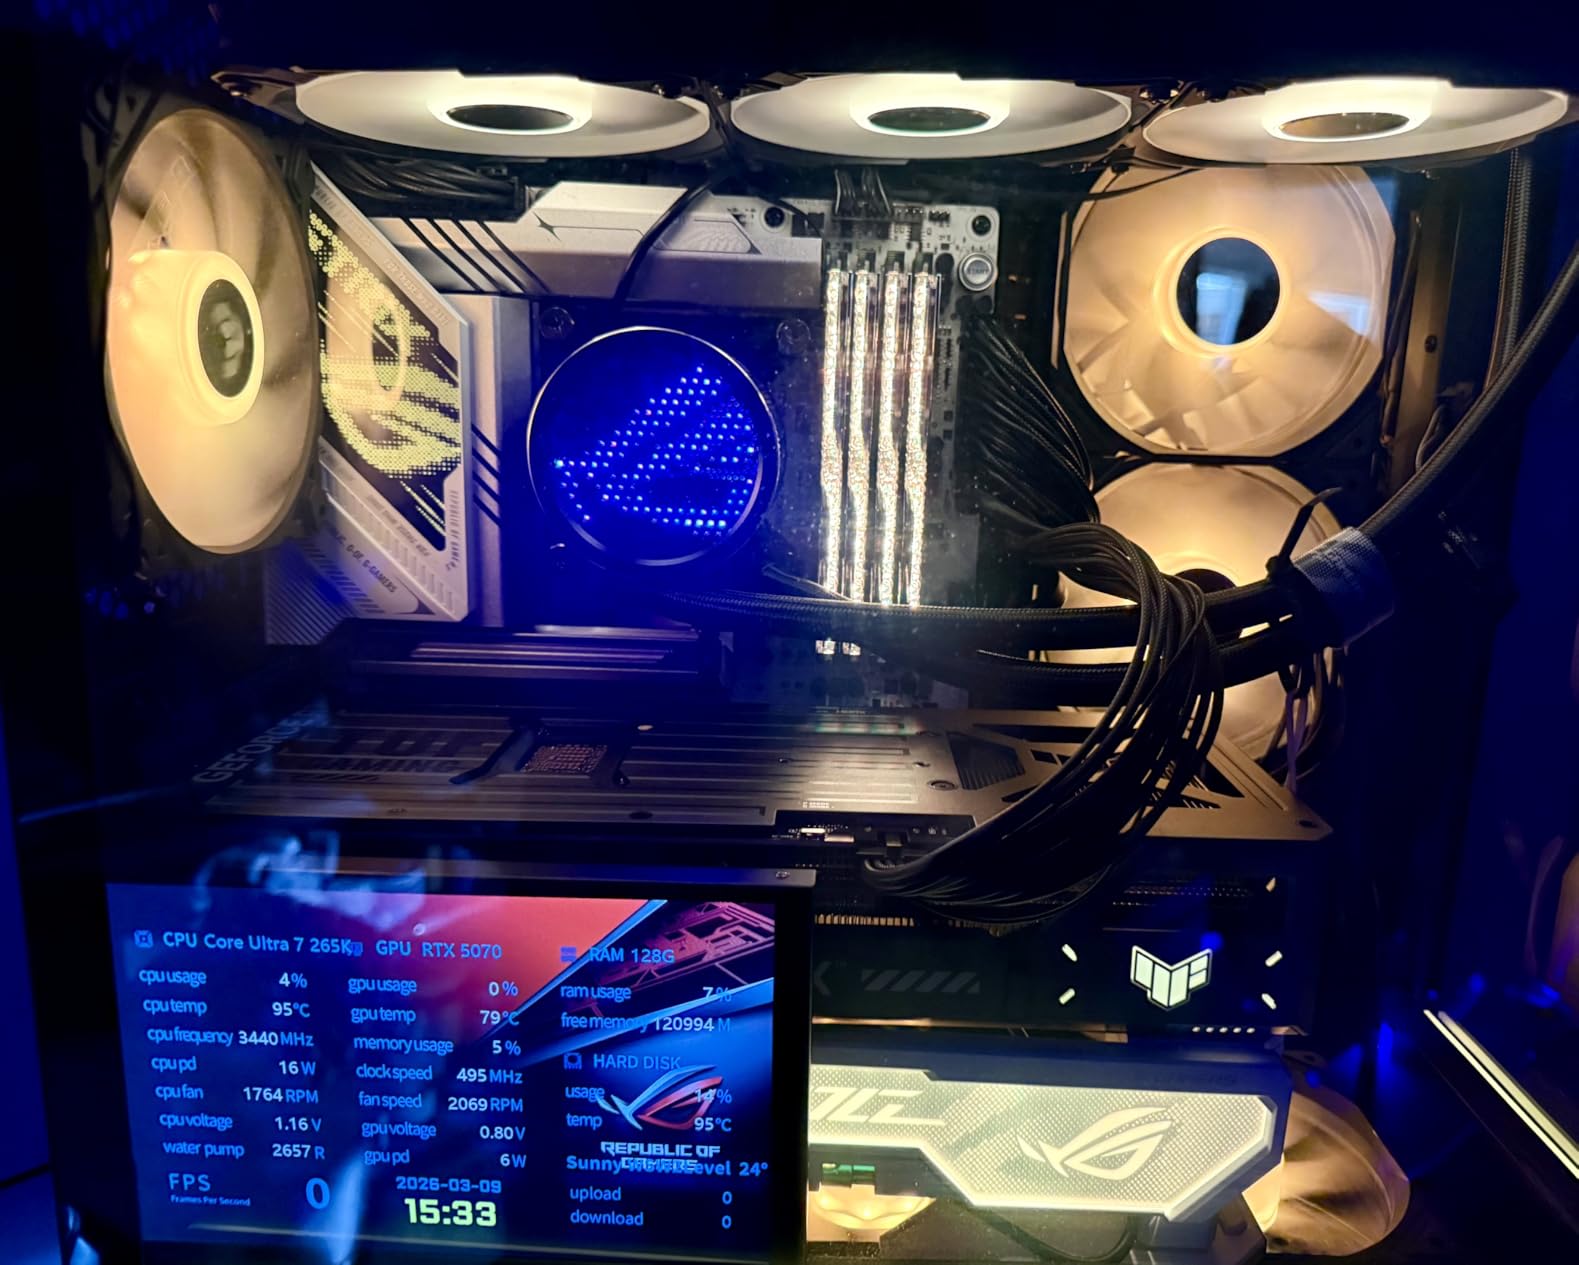
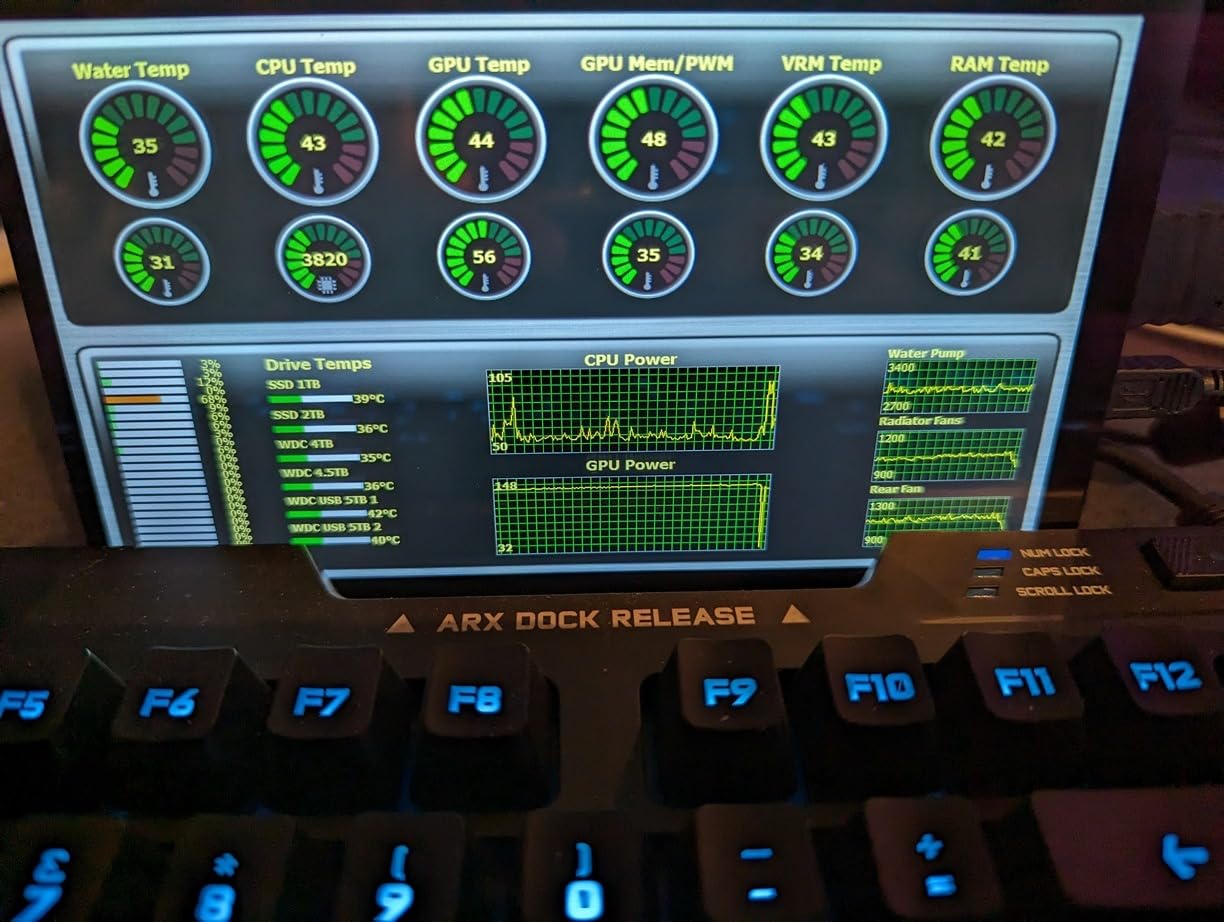
The 1920×480 resolution gives you significantly more horizontal space than 5-inch panels. I could display CPU temperatures, GPU metrics, RAM usage, and fan curves all side-by-side without feeling cramped. The extra width also accommodates wider custom layouts and animated themes that would get compressed on smaller screens.

L-Connect 3 software is the star of the show. It connects directly to Lian Li’s ecosystem of fans and controllers, displaying real-time RPM data alongside your CPU and GPU temps. The software lets you upload custom videos, photos, and GIFs to display when your system is idle. I set mine to cycle through system diagrams and animated wallpapers when I step away from my desk.
The diffused ARGB frame produces a soft glow that enhances your build without overwhelming it. Unlike some RGB implementations that feel garish, the Lian Li’s lighting is subtle and refined. The adjustable mounting bracket offers multiple positioning options, though I found the bracket slightly wobbly when mounted horizontally on my PSU shroud.
Best for Lian Li Ecosystem Builds
If you are already using Lian Li fans, controllers, or cases, this screen integrates seamlessly with your existing setup. The unified software experience and matching aesthetic make it the obvious choice. The premium build quality and extensive customization options justify the price for builders who want a polished, professional look.
Not Ideal for Linux Users or Simple Setups
L-Connect 3 only runs on Windows, so Linux users will need to rely on third-party software or basic display functions. The software complexity might also overwhelm users who just want a simple temperature readout. If you do not care about custom themes, RGB integration, or video playback, you are paying for features you will not use.
5. WOWNOVA 8 inch LCD PC Case Screen – Desktop Mode Support
WOWNOVA 8 Inch LCD Screen Inside PC Case Screen (Desktop Mode Added), 1 Click 1 Cable to Get Started Computer Temperature Display Monitor, Sensor Panel for Inside PC Case with Screen (Black)
1280x800 Resolution
8 inch IPS
USB-C or 9pin
Desktop Mode
0.39 inch Thick
Pros
- One-click software setup
- Desktop mode as extended screen
- Dynamic video themes
- Single cable connection
- IPS full viewing angles
Cons
- Theme editing takes time to learn
- Logo editing needs external software
- Monitoring does not auto-start
- Instructions can be vague
The WOWNOVA 8 inch LCD PC Case Screen brings something unique to the table: desktop mode. Beyond functioning as a sensor panel, it works as a true extended Windows display. I dragged monitoring widgets, Discord, and even a small browser window onto it during testing. This dual functionality sets it apart from panels that only display sensor data.
The 1280×800 resolution at 8 inches strikes a nice balance between screen real estate and pixel density. Text remains readable, and the IPS panel delivers consistent colors from any viewing angle. The aluminum housing gives it a premium feel, and at just 0.39 inches thick, it fits in tight spaces where bulkier displays would not.
Setup was the easiest of any panel I tested. The one-click software installation detected my hardware automatically and started displaying temperatures within seconds. No manual configuration of sensor IDs or hardware detection. For users intimidated by AIDA64’s complexity, this plug-and-play experience is refreshing.
The desktop mode opened up possibilities I had not considered. I used it to display my streaming chat during broadcasts, keeping my main monitor free for gameplay. The dynamic video themes look great, though creating custom themes requires learning the visual editor and potentially using external software like Photoshop for logo editing.
Best for Content Creators and Streamers
The extended desktop functionality makes this ideal for streamers who want to monitor chat, alerts, or system stats without dedicating a full monitor. Content creators can use it for preview windows, timeline scrubbing, or keeping an eye on render progress. The versatility justifies the price for anyone who needs more than just temperature readouts.
Not Ideal for Set-It-And-Forget-It Users
The monitoring software does not automatically start with Windows, so you need to launch it manually after each boot. This is a minor annoyance if you restart frequently. The theme editing learning curve also means significant time investment if you want custom layouts beyond the included presets.
6. ASHATA 5in IPS USB Mini Screen – 40+ Built-in Themes
IPS USB Mini Screen, 5in IPS PC CPU Data Monitor USB Type C for aida64 Temperature Display, PC CPU GPU Data Monitor Computer Temperature Display Type C Sub Screen
800x480 Resolution
5 inch IPS
USB-C Connection
40+ Built-in Themes
Mounting Bracket Included
Pros
- Plug and play setup
- 40-50 built-in themes
- Auto-detect CPU and GPU names
- Supports video backgrounds
- Auto-start with computer
- Sleeps when PC sleeps
Cons
- Software can be difficult to use
- Instructions reference wrong file names
- Included cable may not be data cable
- Software crashes occasionally
The ASHATA 5in IPS USB Mini Screen offers solid value with an impressive selection of built-in themes. I counted over 40 presets ranging from minimalist digital displays to elaborate animated designs. For users who want variety without creating custom themes, this panel delivers out-of-the-box options.
Setup was mostly straightforward, though I hit a snag with the included USB cable. It turned out to be a power-only cable, not a data cable, which prevented the software from communicating with the display. Once I swapped in a proper data cable, everything worked as expected. This seems to be a known issue based on user reviews.
The auto-detection feature correctly identified my AMD Ryzen CPU and NVIDIA GPU without manual configuration. This saved time compared to panels that require you to specify sensor IDs manually. The software supports video backgrounds, which adds visual interest to otherwise static temperature displays.
I appreciate that the display automatically sleeps when my PC goes to sleep. This addresses a common complaint with sensor panels that stay on and display “No Signal” messages. The auto-start function means the monitoring software launches with Windows, so your temperatures appear immediately after boot.
Best for Theme Enthusiasts
If you want lots of visual options without creating custom themes, the 40+ built-in presets give you plenty to choose from. The variety covers different aesthetics from gaming-focused designs to clean professional layouts. The video background support lets you add animated elements without designing them from scratch.
Not Ideal for Seamless Setup
The cable issue and confusing instructions mean you might spend time troubleshooting before getting everything working. The software interface is not the most polished, and occasional crashes require restarting the monitoring process. If you want a flawless out-of-box experience, this might test your patience.
7. ELECROW 5 Inch TN Capacitive Touchscreen – Driver-Free Setup
ELECROW 5 Inch Mini Touchscreen Monitor, TN Capacitive 5-Point Touch Screen 800×480 HD LCD Display Compatible with Raspberry Pi 5/4/4B/3B+/3B/B+, PC, Laptop, Driver-Free
800x480 Resolution
5 inch TN Panel
Capacitive 5-Point Touch
Driver-Free
300 lm Brightness
Pros
- Driver-free plug-and-play
- Works seamlessly with Raspberry Pi
- Capacitive touch is accurate and responsive
- Clear and bright display
- Mounting holes for Pi attachment
Cons
- TN panel has poor viewing angles
- Screen may appear grainy
- Not suitable for gaming or videos
- May need tilting to read clearly
The ELECROW 5 Inch TN Capacitive Touchscreen is the newer, lighter sibling of the popular ELECROW touch screen. At just 3.53 ounces, it is significantly lighter than its predecessor, making it easier to mount in tight spaces. I tested it primarily as a Raspberry Pi sensor panel, where its compact design and Pi-compatible mounting holes shine.
The driver-free setup worked exactly as advertised. I connected it to my Pi 5, and it was immediately recognized as a display device. The capacitive touch registered accurately across the entire screen, supporting five-point touch on Windows systems. For basic sensor panel duty, the responsiveness is more than adequate.
The TN panel is where cost-cutting becomes apparent. Viewing angles are narrow compared to IPS displays, and I found myself adjusting my position to read the screen clearly. The display has a slight graininess that is noticeable when viewing text up close. For pure data display, it works fine, but do not expect the visual quality of premium panels.
Brightness at 300 lumens is decent for most indoor environments. The 60Hz refresh rate handles animated themes without noticeable stuttering. The mounting holes align with Raspberry Pi mounting patterns, making attachment straightforward for Pi-based projects.
Best for Raspberry Pi Projects
This display is optimized for Raspberry Pi integration. The mounting holes, driver-free operation, and lightweight design make it ideal for Pi-based sensor panels or compact dashboard projects. If you are building a Pi-powered monitoring station, this is a solid choice that keeps costs down.
Not Ideal for Visual Quality Demands
The TN panel limitations mean this is not the best choice for builds where display quality matters. If your case has a glass side panel and you want the sensor panel to look as good as the rest of your components, the narrow viewing angles and grainy appearance will be noticeable. Consider spending more for an IPS panel if aesthetics are a priority.
8. Sanpyl 5in IPS USB Mini Screen – Video Theme Support
Sanpyl PC CPU Data Monitor, 5in IPS USB Mini Screen Computer Sensor Panel Display Temperature Monitor for PC CPU Data Monitor, Only Support for System
800x480 Resolution
5 inch IPS
USB-C Connection
Video Theme Support
SD Card Slot
Pros
- Accurate temperature monitoring
- Many built-in themes
- Visual theme editor
- Supports custom video themes
- Auto-start with computer
- Stepless brightness adjustment
Cons
- Software download issues reported
- Website may lack working links
- Stand is flimsy
- Some units arrive cracked
- Software crashes occasionally
The Sanpyl 5in IPS USB Mini Screen rounds out our list with video theme support and a built-in SD card slot. These features enable custom animated backgrounds and multimedia playback that simpler panels cannot match. However, quality control and software availability issues make this a cautious recommendation.
When the panel works, it works well. The IPS display delivers accurate colors and wide viewing angles. The visual theme editor lets you create custom layouts by dragging elements around the screen. I converted several GIF files to MP4 format and used them as animated backgrounds, which added visual interest to my temperature display.

The SD card slot allows you to store theme files and videos separately from your computer. This is useful if you want to display multimedia content without keeping files on your main drive. The stepless brightness adjustment lets you fine-tune the display level to match your ambient lighting.
The concerns come from quality control and support. Some users report receiving units with cracked screens, and the included stand is flimsy at best. More troubling are reports of software download links that do not work, leaving users unable to configure the panel. The 22% one-star rating on Amazon reflects these frustrations.

Best for Experimentation and Customization
If you enjoy tinkering and are willing to accept some risk, the video theme support and SD card functionality offer creative possibilities. The theme editor provides decent customization options for users who want to design their own layouts. Just make sure you can return it if quality issues arise.
Not Ideal for Reliability-Focused Builds
The quality control concerns make this hard to recommend for builds where reliability matters. If you are constructing a showcase rig or a system you plan to showcase, the risk of receiving a defective unit or struggling with software downloads adds unnecessary stress. Consider the WOWNOVA or ELECROW options for more consistent quality.
Buying Guide: How to Choose the Best 5-Inch USB-C PC Sensor Panel
Choosing the right sensor panel involves more than just picking the cheapest or highest-rated option. Your specific build, software preferences, and mounting situation all factor into the decision. Here is what I learned from testing these panels across multiple configurations.
Screen Size: Why 5-Inch Is the Sweet Spot
Five inches hits the balance between readability and space efficiency. Smaller 2.9-3.5 inch panels work for compact SFF builds but strain readability from any distance. Larger 8.8 inch panels like the Lian Li offer more screen space but require significant case real estate. For most mid-tower and full-tower builds, 5 inches fits perfectly on PSU shrouds, fan mounts, or case side panels without overwhelming the aesthetic.
The 5-inch size also typically offers 800×480 resolution, which displays clear text and graphics without the pixelation visible on lower-resolution alternatives. If you want to display multiple metrics simultaneously, this resolution provides enough horizontal space for CPU, GPU, RAM, and fan data side-by-side.
Connection Types: USB-C vs HDMI vs USB2SPI
USB-C single-cable connections offer the cleanest setup for internal mounting. One cable handles both power and data, simplifying cable management significantly. Panels like the WOWNOVA and ROADOM use this approach, requiring only a connection to your motherboard’s internal USB header.
HDMI plus USB connections, found on the ELECROW panels, offer broader compatibility but require two cables. The HDMI connects to your graphics card for video, while USB handles power and touch input. This works well if you have spare GPU ports but complicates internal cable routing.
USB2SPI is a niche option primarily used by AIDA64 enthusiasts who want direct sensor communication without Windows treating the display as a secondary monitor. Support is limited, and availability is scarce, making this an advanced option for experienced users.
IPS vs TN Panels: What You Need to Know
IPS panels offer superior viewing angles, better color accuracy, and more consistent brightness across the screen. If your case has a glass side panel and you view the display from various angles, IPS is worth the extra cost. All of my top recommendations use IPS technology.
TN panels cost less but suffer from narrow viewing angles and color shift when viewed off-center. The ELECROW TN touchscreen demonstrates this limitation clearly. For budget builds or projects where you always view the screen head-on, TN panels are functional but not impressive.
Software Ecosystem: AIDA64 vs Proprietary Options
AIDA64 Extreme is the gold standard for sensor panel software, offering extensive customization and support for virtually every sensor in your system. However, it costs around $60 and has a steep learning curve. If you want complete control over your display layout, AIDA64 is worth the investment.
Proprietary software from manufacturers like WOWNOVA, Lian Li, and ROADOM offers simpler setup with pre-built themes. L-Connect 3 for Lian Li displays integrates with their fan ecosystem, providing unified control. These options work well for users who want functional displays without diving deep into customization.
Third-party alternatives like HWiNFO64 and Rainmeter offer free monitoring with varying levels of display customization. Rainmeter requires manual configuration and some coding knowledge, but provides extensive flexibility for patient users.
Mounting Options: Finding the Right Fit
PSU shroud mounting is the most popular option for mid-tower cases. The flat surface provides easy attachment using magnetic frames, adhesive pads, or screws. Measure your shroud’s available space before purchasing, as some 8.8 inch panels will not fit narrower shrouds.
Fan bracket mounting works for cases with exposed 120mm or 140mm fan mounts. Many panels include brackets that attach to standard fan screw patterns. This position offers good visibility but may require longer cables to reach motherboard headers.
Magnetic mounting eliminates drilling and provides easy repositioning. The Thermalright Trofeo Vision uses this approach effectively. However, magnetic mounts require a steel surface, which rules out aluminum cases and some tempered glass panels.
Case Compatibility Considerations
Before purchasing, measure your intended mounting location carefully. Consider depth as well as surface area, as thicker panels may interfere with components behind the mounting surface. Account for cable routing, as you need clearance for the USB cable to reach your motherboard header.
For small form factor cases like the NR200P, 5-inch panels fit well on PSU shrouds with room for cable routing. Full-tower cases offer more flexibility but may require longer cables depending on header placement. Check your motherboard’s USB header locations before finalizing your panel position.
Power Consumption and USB Header Availability
Most 5-inch sensor panels draw less than 5 watts, which is negligible for modern power supplies. The bigger concern is USB header availability. If you already have fan controllers, AIO coolers, and other USB devices competing for internal headers, you may need a USB hub or external connection.
Some panels like the ROADOM include built-in USB hubs that expand your connectivity while using only one motherboard header. This is worth considering if header availability is tight in your build.
FAQ’s
What is the best tool to monitor CPU temperature?
For hardware displays showing real-time temperatures, 5-inch USB-C PC sensor panels provide at-a-glance monitoring without alt-tabbing from games. For software monitoring, HWiNFO64 offers the most comprehensive sensor data, while Core Temp provides a lightweight alternative for simple per-core monitoring.
Do I need AIDA64 for these displays?
No, most 5-inch USB-C sensor panels come with proprietary software that works out of the box. L-Connect 3 powers Lian Li displays, and WOWNOVA includes self-developed software. AIDA64 is only required if you want custom layouts and extensive customization, but it costs around $60 and has a steeper learning curve.
How do I connect a temp display to my PC?
For USB-C panels, connect the cable to an available USB 2.0 header on your motherboard. For HDMI+USB panels, connect HDMI to your graphics card and USB to the motherboard header. Install the manufacturer’s software, configure which sensors to display, and test the connection.
What size CPU temp screen should I get?
2.9-3.5 inch panels work for compact builds but are harder to read from a distance. 5 inch panels offer the best balance of readability and space efficiency for most cases. 6.86-8.8 inch panels provide maximum readability but require significant case space and cost more.
Is 100 degrees too hot for a CPU?
100 degrees Fahrenheit (38 degrees Celsius) is perfectly safe and normal for a CPU. 100 degrees Celsius (212 degrees Fahrenheit) is at the thermal limit for most Intel processors and causes throttling. AMD Ryzen typically throttles at 95 degrees Celsius. Sustained temperatures near these limits indicate inadequate cooling that should be addressed.
Conclusion: Which 5-Inch USB-C PC Sensor Panel Is Right for You?
After testing these 8 panels across multiple builds, my top recommendation goes to the WOWNOVA 5 inch Computer Temp Monitor for most users. Its combination of dynamic themes, ARGB integration, and reliable single-cable USB-C connection hits the sweet spot for showcase builds and gaming rigs. The 442 reviews and established track record give me confidence in long-term reliability.
For budget-conscious builders trying sensor panels for the first time, the ELECROW 5 Inch Touch Screen Monitor at under $40 is unbeatable value. The plug-and-play setup and capacitive touchscreen make it perfect for learning what you want from a sensor panel before investing in premium features.
Content creators and streamers should consider the WOWNOVA 8 inch LCD PC Case Screen for its desktop mode functionality. Being able to display chat, alerts, or other applications alongside system temperatures makes it more versatile than pure sensor panels.
If you want the absolute best regardless of price, the Lian Li 8.8 inch Universal Screen delivers premium build quality, sophisticated software, and ecosystem integration that justifies the investment for serious enthusiasts.
Whichever panel you choose, adding a 5-inch USB-C PC sensor panel to your build transforms how you interact with your system. Seeing your temperatures in real-time without interrupting your games or workflow is genuinely useful, and the visual appeal adds that extra layer of polish to showcase builds. Pick the panel that matches your budget, case space, and aesthetic preferences, and enjoy watching your system come alive with data.